How to clean a record player
, by Haim Deutsch, 3 min reading time
, by Haim Deutsch, 3 min reading time
You need to clean your record player, you know that. Everyone says it, and you ignore it. You’d be less likely to ignore it if you know that the dust and dirt that gathers around your player affects the sound. That stuttering, that cracking, that's the result of an unclean record player.
You need to clean your record player, you know that. Everyone says it, and you ignore it. You’d be less likely to ignore it if you know that the dust and dirt that gathers around your player affects the sound. That stuttering, that cracking, that's the result of an unclean record player.
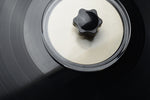
The most sensitive part of any turntable is the needle, which is also the component that gathers the most dirt as it picks up anything that happens to be on the record. Anything, no matter how small, can get stuck to the needle. This produces that jarring crackle. Not only is this not ideal for your hearing, it can mean that your records can get damaged - a dirty needle wears out more quickly than a clean one, and as a result will damage your records more quickly.
But this is not all. The whole turntable can be affected by the dust that exists in your space. A dust cover over your turntable is an ideal way to protect your gear - look out for turntables that have a protective plastic cover as well, eliminating the need for any kind of additional blanket.
First things first, begin with the surfaces of the turntable - there will be the most dust here. If you are not doing a full clean, a quick swift or dust will suffice.
Using a clean, lint-free cloth, start in the middle and wipe outwards from the centre. You can tackle the more stubborn stains (fingerprints, etc) with alcohol. Rub the surface once more with an antistatic cloth. An antistatic cloth is a crucial tool for cleaning, as it means the surface cannot get charged by the wiping and therefore prevents lint and dust becoming immediately attracted to it.
You should not use your bare fingers whilst cleaning your turntable, especially considering the needle! If the turntable is not in use, you should use a dust cover.
Now that the exterior is clean, you can venture your cleaning process into the inner sanctum of the record player. Why would you do this, you ask? Well, they simply sound better and will last longer, especially if your turntable has a belt-drive mechanism.
You must turn off the power before you begin cleaning the interior of your record player - just to minimise the chance of anything happening to you while in the act. After that, you should remove the cover and the mat, and then the turntable platter itself. Your turntable should come with instructions on how to do this properly and effectively - there is not a catch-all guide for removing platters. Now, you should be able to see some of the inner workings. You can remove the belt carefully and treat it with alcohol or a cloth, whichever you have to hand. You should clean the underside of the platter as well. After the parts have dried, you can begin putting the parts back together. This process, a much more daunting one than cleaning the exterior, does not have to happen all the time - once a year would be an optimal frequency for cleaning the insides of your turntable.